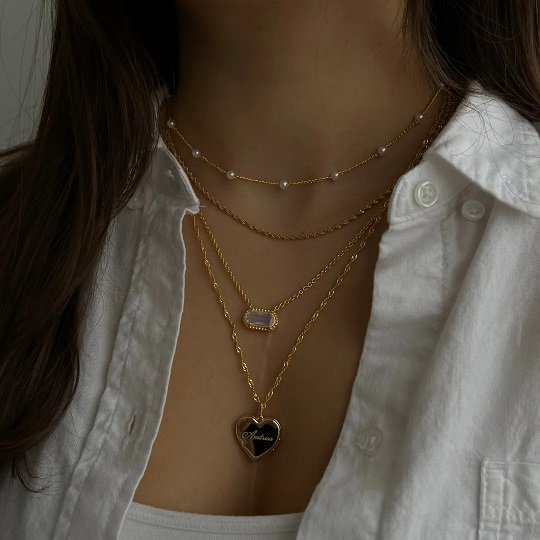
Crafting a personalized necklace is an exciting and rewarding project that allows you to express your creativity and create a unique piece of jewelry. If you’re new to the world of jewelry-making, it might seem a bit intimidating, but don’t worry! This guide is here to help you understand the basics and get you started on your journey to creating a beautiful customized necklace.
Why Make Your Own Necklace?
Hobbies That Spark Creativity
Jewelry-making is not only a fun hobby but also a way to express your creativity. When you design your own necklace, you get to choose every detail, from the materials used to the colors and styles you like best. Unlike buying ready-made jewelry, making your own gives you complete control, allowing your personality to shine through in your work.
Personalized Gifts for Loved Ones
A custom-made necklace by Evry Jewels is also a great way to create a thoughtful gift for friends or family. Imagine giving someone a necklace that you designed specifically for them—it’s a heartfelt gesture that will be cherished for years to come.
Getting Started: Essential Tools and Materials
Tools You’ll Need
Before you start, it’s important to gather some basic jewelry-making tools. Here’s what you’ll need:
- Pliers: You’ll need chain-nose pliers and round-nose pliers to shape and connect components.
- Wire Cutters: These are used to trim beading wire or other metal components.
- Measuring Tape or Ruler: For making sure your necklace is the perfect length.
These tools are quite easy to find online or at craft stores, and they form the foundation for making jewelry.
Picking the Right Materials
To create a customized necklace, you will also need some essential materials:
- Beads: Beads come in a variety of shapes, sizes, and colors. Choose the ones that best suit your style.
- Stringing Material: You can use beading wire, thread, or even leather cord depending on the look you’re going for.
- Clasps: A clasp is necessary to close your necklace. There are different types, like lobster clasps and toggle clasps, each with their own benefits.
It’s important to pick high-quality materials, as this will ensure that your necklace lasts longer and looks better.
Design Tips for Beginners
Start with Simple Designs
If you’re just starting out, it’s a good idea to begin with a simple design. Try making a single-strand beaded necklace to get the hang of the process. Once you’re comfortable, you can move on to more complex designs like multi-strand necklaces or those with intricate pendants.
Choose a Focal Point
One of the easiest ways to create an eye-catching necklace is to choose a focal point—a large bead or pendant that stands out from the rest. This not only makes the necklace visually appealing but also helps give the design structure and flow.
Play with Colors and Textures
Don’t be afraid to experiment with different bead colors and textures. Mixing matte beads with shiny ones, or combining beads of different shapes and sizes, can add depth and interest to your necklace. Start by picking a color scheme, such as complementary colors or shades of the same hue, to keep your design cohesive.
Step-by-Step Guide to Making Your Necklace
Step 1: Plan Your Design
Before you start stringing beads, lay them out on a flat surface in the pattern you want. This gives you a chance to see how the finished piece will look and make changes before you commit. Using a bead board can be helpful for keeping everything organized.
Step 2: Cut the Stringing Material
Measure the length of stringing material you need. A typical necklace is about 18 inches, but you can adjust the length based on your preference. Remember to add an extra couple of inches to accommodate tying and attaching the clasp.
Step 3: String the Beads
Once you’re happy with your layout, begin stringing the beads onto the wire or thread. Make sure to start and end with smaller beads if you’re using a large focal bead in the center. This helps balance the weight of the necklace and makes it look more professional.
Step 4: Attach the Clasp
Use crimp beads to secure the clasp to the ends of the wire. Thread the end of the wire through the crimp bead and the loop of the clasp, then back through the crimp bead. Use chain-nose pliers to flatten the crimp bead and hold everything securely in place.
Step 5: Finishing Touches
Once the clasp is attached, double-check the necklace for any loose beads or errors. Once everything looks good, you’re ready to show off your creation!
Tips for Troubleshooting Common Issues
Beads Not Sitting Right?
If your beads aren’t lying flat or the necklace feels uneven, try using spacer beads. Spacer beads help to even out the gaps between larger beads and give your design a more polished look.
String Breaking Too Easily?
If your string breaks easily, it might be because you’re using material that’s not strong enough for the beads you’ve chosen. Make sure to use beading wire for heavier beads, as it provides more support compared to nylon or elastic thread.
Experiment and Have Fun!
Trying Different Styles
Once you’ve mastered the basics, there are so many other styles you can try! From chokers to multi-strand necklaces, the possibilities are endless. You can also experiment with different types of materials like natural stones, glass beads, or even fabric.
Learn from Others
Don’t forget that there are many resources available to help you learn more about jewelry-making. Check out online tutorials, join local craft classes, or connect with other jewelry-makers in forums. Seeing others’ designs can inspire you and give you new ideas to incorporate into your own pieces.
Conclusion
Creating your own customized necklace is a fantastic way to express yourself and make something truly unique. Whether you’re making it as a personal accessory or a gift for a loved one, the process of designing and crafting can be incredibly rewarding. Remember, start simple, experiment with different materials, and most importantly—have fun! With these beginner tips in hand, you’re well on your way to becoming a jewelry-making pro.


